Recipes
My Just Desserts! Chocolate Cupcakes.
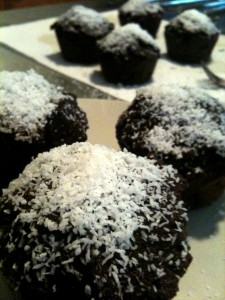
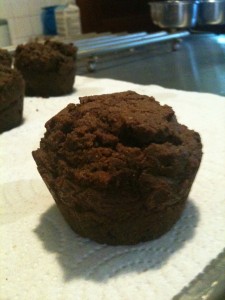
You probably have already figured out that I have a wicked sweet tooth. Consequently I find myself constantly trying to satiate my cravings by creating primal, or mostly primal desserts. I say mostly primal because sometimes I use an ingredient that some primal folk may not even consider eating. For instance, in the last week I made Chocolate Cupcakes and a Chocolate Cheesecake. The cupcakes are mostly primal, I only used stevia to sweeten them and a very small amount of melted chocolate chips with cream to frost them. On the other hand, the cheesecake is certainly less primal because I used considerably more of the Ghiradelli Dark Chocolate Chips (62%) which, of course, contain sugar. While one slice of the cheesecake is fairly low on the carb count, not everyone will indulge. I don’t feel so bad indulging once in awhile, especially since my carb count, even when I do, is usually well below 100 grams a day. In addition, the sugar effect is less impactful due to the generous amount of healthy fat in the other cheesecake ingredients. If you are just not that comfortable with the sugar, then go with the cupcake. If you won’t eat any sugar at all, then skip the cheesecake and the icing on the cupcake. Even without it, the cupcakes will be moist, decadent and rich, and especially good with a good cup of coffee. Alternatively, you could whip up some heavy whipping cream and cinnamon to top the cupcakes. Here’s the cupcake recipe. Later this week I’ll be posting the cheesecake recipe.
Primal Chocolate Cupcake
To make the cupcakes, you will need:
- 1/2 cup coconut flour
- 2 heaping tbls. cocoa powder
- 1/4 tsp. salt
- 1/4 tsp. baking soda
- 6 eggs
- 1/2 cup cup of softened butter or melted coconut oil
- 1 tsp. vanilla extract
- 6-8 packets purevia (stevia) or 1/4-1/2 cup honey
- 1/3 cup dark chocolate chips
- 1 tbls. heavy whipping cream
- coconut flakes or chopped nuts for topping (optional)
To prepare the cupcakes:
Preheat the oven to 350º. Mix all dry ingredients together. In a separate bowl beat eggs, vanilla, and butter or coconut oil (and honey if you choose to use it as a sweetener) until creamy. Combine wet and dry ingredients and beat with a hand mixer until smooth and all ingredients are completely incorporated. The batter will probably be on the thick side. Scoop batter into pre-greased muffin tin (I used an ice scream scoop). You should get 6-8 cupcakes.. Bake in the oven for about 30 minutes. Check the muffins after about 20 minutes by sticking a toothpick in the center. If it comes out clean they are done. If not continue to bake and check every 5 minutes. You don’t want to overcook these cupcakes. When the cupcakes are done, remove from the oven and let cool for about 20 minutes. In the meantime, in a double boiler combine the chocolate chips and cream and stir until combined a melted. When the cupcakes are cool, spread a thin layer of the chocolate on top of the cupcake with a small spatula and then dip in coconut or nuts.
Enjoy!
The Never-Ending Search for Primal Substitutes: The Rutabaga
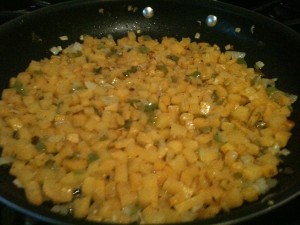
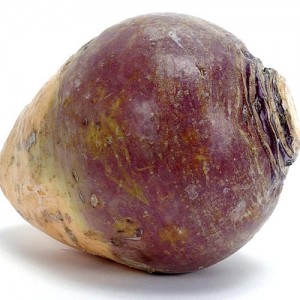 In my never ending search for the perfect primal substitutes I recently came across the rutabaga, something to date I’ve seen in the grocery store but never used or eaten. It seems to be a perfect potato substitute. To date, I’ve only used the rutabaga in one preparation, as Potatoes O’Brien this past Sunday for brunch. Yummy!
Rutabagas are often thought of as yellow turnips and belong to the highly prized family of cruciferous vegetables. The rutabaga, a relatively newcomer in the world of vegetables, is thought to have evolved from a cross between a wild cabbage and a turnip. The earliest records of rutabaga’s existence are from the seventeenth century in Southern Europe where they were first eaten as well as used for animal feed. It’s funny that throughout history animals were often fed the healthiest foods, foods thought to be inappropriate for human consumption. They are relatively low in carbs and check out these nutritional specs.
Rutabaga Nutrition
100 grams or 3 1/2 ounces
| Nutrient | Cooked | Raw |
| Calories | 39 | 36 |
| Protein | 1.3 g | 1.2 g |
| Total Fat | .6 g | .6 g |
| % Calories from fat | 5.1% | 5.0% |
| Carbohydrates | 8.7 g | 8.1 g |
| Fiber | 1.8 g | 2.5 g |
| Calcium | 48.0 mg | 47.0 mg |
| Copper | .04 mg | .04 mg |
| Iron | 53 mg | .52 mg |
| Magnesium | 23.0 mg | 23.0 mg |
| Manganese | .17 mg | .17 mg |
| Phosphorous | .57 mg | .58 mg |
| Potassium | 326.0 mg | 337.0 mg |
| Selenium | .7 mg | .7 mg |
| Sodium | 20.0 mg | 20.0 mg |
| Zinc | .350 mg | .340 mg |
| Vitamin A | 561.0 IU | 580.0 IU |
| Vitamin B1 Â Thiamine | .082 mg | .090 mg |
| Vitamin B2 Â Riboflavin | .041 mg | .040 mg |
| Vitamin B3 Â Niacin | .72 mg | .7 mg |
| Vitamin B6 Â Pyridoxine | .102 mg | .100 mg |
| Vitamin C | 18.8 mg | 25.0 mg |
| Vitamin E | .15 mg | .30 mg |
| Folate (folic acid) | .15 mcg | .21 mcg |
| Pantothenic Acid | .155 mg | .160 mg |
| Saturated Fat | .03 g | .03 g |
| Monounsaturated Fat | .07 g | .07 g |
| Polyunsaturated Fat | .04 g | .04 g |
So despite never seeing anything or reading anything about the rutabaga (other than a preliminary check on carbs to see it it met primal muster – it did) I decided to try and make hash browns or what I grew up calling Potatoes O’Brien.  It was delicious. I peeled the rutabaga (they are pretty big – a nice size one was enough to serve 2) and started to slice it. It seemed to be some what hard and “woody” and therefore I figured I would probably have to boil it before frying it. I cut it into a relatively small dice 1/4 – 1/3 inch dice, and this worked out perfectly.
Primal Potatoes O’Brien
Here’s what I did. You will need (for 2 servings):
- 1 large rutabaga
- 1/2 medium yellow onion, diced
- 1/2 green pepper, diced
- 2 cloves of garlic, minced
- 2-3 tbls. butter
- 1 tbls. olive oil or coconut oil
- salt and pepper to taste
To prepare the Potato’s O’Brien:
Place a medium pot filled with water on the stove and bring to a boil. Meanwhile, peel the Rutabaga with a vegetable peeler or knife and cut into 1/4″ – 1/3″ dice. When the water comes to a boil place the diced Rutabaga in the water and boil for 10-15 minutes until the Rutabaga is softened. Drain the Rutabaga well.  Now, place 2-3 tbls of butter and 1 tbls. olive oil in a good non- stick skillet over medium heat. When the butter/oil mixture starts to bubble, add the diced onion, green pepper and garlic and saute for a few minutes until soft. Now add the well drained rutabagas.
Saute the rutabaga mixture until well browned. I found that it took a little longer to brown the rutabaga as compared to potatoes, so be patient (it might be because they have higher water content that needs to steam off). Don’t disturb the mixture very much and it will brown very nicely. Just check on it every few minutes. When the rutabaga is browned to your liking, serve with breakfast or your favorite entree.
I will be trying other methods of preparation, including roasted and mashed. I might even try grating it raw for a cole-slaw. I’ll keep you posted and hope you enjoy this dish as much as we did.
All is not Lost: Primal Lasagna.
 There are certain things that I thought I would likely never eat again. One of those things was Lasagna. This is something that I have always loved, but didn’t eat too much prior to going primal anyway, mostly due to the fact that my previous health conscience told me it was too decadent, too high in fat and simply not that healthy. Well my thoughts in that regard have clearly changed, and sans the pasta, lasagna seems like a good primal fit. I decided to revisit this lost favorite and ingenuity won out. You may recall my previous post regarding making enchiladas where I sued an egg crepe as the substitute for the tortilla. I figured I could use the same egg crepe as the lasagna noodle in this dish. It worked very well and the lasagna turned out delicious and virtually undetectable from the high carb pasta version. While somewhat labor intensive, it was well worth it. It took about an hour to prepare and another45 minutes to bake and then 10-15 to rest. Give it a try when you have some time to devote to this delicious dish.
Primal Lasagna
First prepare your favorite meat sauce. I start by simply sauteing a medium onion and about 3 cloves of garlic in olive oil. I then add 1/2 lb. of bulk italian sausage and 1 lb. of hamburger to the same pan. I add salt and pepper to taste along with a generous sprinkling of crushed red pepper (I like it spicy). When the meat is browned I add a 24 oz. can of Trader Joe”s Marinara Sauce (perfectly primal with no sugar) or you can use your favorite homemade tomato sauce or jarred suace. I then add about a tbls. of italian seasoning and more red pepper flakes. I let this simmer while I prepare the remaining components. You want the sauce to be meaty and on the thick side so the lasagna doesn’t turn out runny.
Next make the egg crepes. You will need:
- 6 eggs
- 2-3 tbls. water
- 2-3 tbls. grated parmesan cheese
- salt and pepper to taste
To prepare the egg crepes combine all ingredients and whisk together thoroughly. You want to add the water to the eggs so that the egg batter is thinner and will result in a thinner crepe. Heat a 12″ good non stick skillet over medium heat and spray with olive oil. Add about 1/2 cup of the egg mixture to the pan and swirl to evenly coat the whole pan. Cook the egg crepe until fully cooked through (you can flip it if you want when it is cooked through but this is not necessary). Set aside and continue making crepes until all of the egg mixture is gone. You should end up with 5 crepes.
Next make the filling. You will need:
- 1 container of whole milk ricotta cheese
- 2 tbls. fresh parsely (or an equal amount of dried parsley)
- 2 eggs
- 3 tbls. parmesan cheese
- salt and pepper to taste
Whisk all ingredients together until smooth.
Now you can assemble the lasagna. In addition to the ricotta filling, meat suace and egg crepes you will simply need 2 cups of finely shredded mozzarella cheese. As you can see from the picture above, I used a 12″ round stainless steel skillet because of the shape of the crepes. Spray the lasagna pan with olive oil. Spread a small amount of sauce on the bottom of the pan and then place one egg crepe on top. Spread this layer with a layer of the ricotta filling and then top with shredded mozzarella cheese. Place another egg crepe on top and spread with a generous amount of meat sauce. Put on a layer of the shredded mozzarella cheese and then top with another egg crepe. Spread this layer with more ricotta filling, top with shredded mozzarella and then place another egg crepe over this. Place a generous layer of meat sauce and cheese and top with the last egg crepe. Now spread the remaining ricotta filling and top with the remaining meat sauce. Cover with the remaining shredded mozzarella cheese and a generous sprinkling of grated parmesan. Place the lasagna in a preheated 350º oven for about 45 minutes. It should be bubbling hot by this point. If the cheese is not browned, turn on the broiler and broil for a few minutes until the cheese is browned to your liking. Remove the lasagna from the oven and let rest for about 15 minutes so that it will set. Serve with your favorite green salad and enjoy. This should make4-6 good servings.
Enjoy
Let Them Eat Cake
 Okay, sometimes a guy just needs some cake, chocolaty rich cake! As a big sweet fan I miss cakes and cookies almost as much as I miss bread, rice, pasta and potatoes. The other day I was thinking about the “Oopsie Rolls” I have been making and wondered whether I could make a cake using the same method. I think I was successful, but will be trying out some tweaks in the future. However, this cake was pretty darn good and so I thought I would share the recipe with you right away (I don’t want to deprive my Primal buddies for a minute longer than necessary). I also made a quick strawberry ice cream that I layered between two pieces of the cake. Oh my! The ice cream only took about 5 minutes to make and was really good, especially paired with the rich dark chocolaty cake. After baked, the cake turns out a little on the thin side, so layering it with ice cream was the perfect solution. (The next time I make it I will add additional egg whites to see if I can increase the volume). A word of warning, however. I used stevia (purevia) as the sweetener and therefore some of you may shy away from this recipe. But I only used 6 packets for both the cake and ice cream and felt it was well worth the splurge. Give it a try and I hope you like it as much as we did.
Chocolate Cake and Strawberry Ice Cream
For the cake you will need:
- 3 eggs, yolks and whites separated
- 1/8 to 1/4 tsp of cream of tartar
- 1/4 cup unsweetened cocoa
- 4 packets of purevia (stevia) sweetener
- 1 tsp. vanilla
- water for thinning the batter
- coconut oil to grease the cake pan
- coconut powder as a garnish
For the strawberry ice cream you will need:
- 1/3 cup heavy whipping cream
- 1 cup frozen strawberries diced
- 2 packets of purevia
You will also need a hand mixer and a stand blender or food processor.
To prepare the Chocolate Cake:
Separate the egg yolks and whites in two metal mixing bowls. Add the cream of tartar to the egg whites and blend until you obtain stiff peaks. Now, in the separate bowl, add the cocoa powder and vanilla to the egg yolks and beat until smooth. If the mixture seems to thick, add water a tablespoon or two at a time until you get a thinner batter that will be easy to incorporate into the stiff egg whites. Now slowly fold the chocolate batter into the egg whites trying to not lose the volume of the egg whites. Pour the batter into a 8 inch square greased cake tin and bake in the oven at 325º for 20 minutes. You can check the cake after about 15 minutes to see if it is done by placing a tooth pick in the center. If it comes out clean it will be done. Be careful not to overcook the cake as it may dry out. when done, remove the cake and let cool before serving.
To prepare the Strawberry Ice Cream filling:
Pour heavywhipping cream into blender and add purevia sweetener. Blend for about a minute at high speed until it starts to turn into whip cream. Add the frozen diced strawberries and blend until incorporated. don’t over process as you want to maintain the cold ice cream consistency.
Slice the cake into 4 even size pieces. Place 1/2 the strawberry ice cream on two pieces of the cake and top each with another piece of cake. Sprinkle with coconut powder and serve immediately.
Variations: You could also fill the cake with any flavored whipped cream and/or your favorite fresh berries. You could also top with whip cream and drizzle with melted dark chocolate.
I hope you like this and let me know what you think.
Primal Chicken Enchiladas
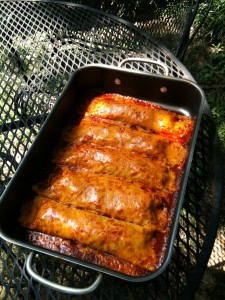
 Sadly all vacations must come to an end, and I am back at home and already ready for my next vacation. This was my first real vacation to Mexico and it was no surprise to me that I would love it. I used to live on the Mexican border in south Texas and have always loved the Latin culture. Mexican food has always been a favorite of mine. While living in south Texas I learned to make some great authentic Mexican dishes. However, I have cut back on eating at my favorite Mexican restaurants as many of my favorite dishes include things that don’t fit into the primal lifestyle. Additionally, many of these dishes are hard to adapt to the primal lifestyle. I’m learning however that it is not not impossible. I’ve got lots of new inspiration and ideas after this most recent trip so keep tuned in for more Mexican recipes to follow. Many Mexican dishes use beans, corn, and tortillas, all things that are, of course, things that most of us Primal folks just don’t eat any more.  One of the biggest staples in Mexican cooking is the corn or flour tortilla. They are perfect for wrapping up delicious spicy fillings. I’ve come up with a substitute, that while not great for ripping apart and sopping up delicious sauces or salsas, is perfect for making many dishes, including enchiladas. These “tortillas” are simple to make. and make a great substitute from a taste and textural standpoint. I hope you try this delicious recipe and enjoy it as much as I do.
Chicken Enchiladas
To make these Enchiladas you will need about 2-3 cups of Enchilada sauce, homemade or your favorite commercial variety. In a pinch, I use a commercial enchilada sauce that I buy at the local Mexican grocery. When I have time, I will make it myself. Here’s how to make your own homemade sauce. This makes about 4 cups, so you can save half of it for later use.
You will need:
- 12 ancho chiles (dried)
- 4 chiles de arbol (dried)
- 2 roma tomatoes
- 1 small onion chopped into 4 chunks
- 2 garlic cloves
- 1 teaspoon of Mexican oregano
- 1/8 teaspoon of cumin
- salt to taste
Prepare the red enchilada sauce:
1. Rinse the ancho chiles and the chiles de arbol under cold water and pat dry. Tear open the chiles and remove the seeds and veins. Toast the chiles, the onion, and garlic in a dry pan over medium low heat until fragrant. This should take about five minutes. Keep turning the chiles so that they do not burn.
2. Bring six cups of water to a boil and add all of the chiles, chopped tomatoes, onion, and garlic. Reduce the heat and simmer for fifteen minutes.
3. Transfer the contents of the pan to a blender and add the oregano and cumin. Blend for two minutes until the mixture is very smooth. Place a towel over the top of the blender while blending to protect from any splatters. Be careful because the mixture is very hot.
4. Return the contents of the blender back to the pan by forcing the mixture through a strainer with the back of a spoon to remove the tough bits of chile skin that remain. Don’t skip this step it greatly improves the texture of the finished sauce.
5. Simmer the strained enchilada sauce for 15 minutes to blend the flavors. Add salt to taste.
Now, to make the Enchiladas, you will need:
- 1 whole roasted chicken (meat removed and roughly shredded)
- 2-3 cups of red enchilada sauce
- 6 eggs
- 1-2 tsp. chili powder
- 2-3 tbls. water
- salt and pepper to taste
- 1 cup shredded sharp cheddar cheese (or more if you like it really cheesy)
- 1/2 cup grated queso fresco or cotija cheese (optional)
- prepared salsa (optional)
First, shred the chicken in a bowl and add about 1/2 cup of enchilada sauce to the chicken. Mix the chicken and sauce until the chicken is evenly coated. You want this to be on the dry side, not soupy. Now, make the “tortillas”. Break 6 eggs into into a bowl, season with salt and pepper to taste and add 1-2 tsp. chili powder and 3 tbls. water. Beat well. You want this mixture to be on the thin side so the tortillas will be thin enough when you make them. I prefer larger tortillas so I use a good non stick 12″ skillet. You can make smaller tortillas by using a smaller skillet. The key is having a good non stick skillet. Heat the non stick skillet over medium heat until hot. I usually spray the pan with my olive oil sprayer prior to making each tortilla. Add about 1/2 cup of the egg mixture to the hot pan and swirl the eggs around until you have a thin even coating over the entire pan. Use a spatula and push down the sides a little if necessary. Cook the egg mixture until it is well done and cooked through. It is not necessary to flip the tortilla, but you can if you like. remove the cooked egg tortilla from the pan and place on a plate and continue to make the tortillas until all the egg mixture is gone. 6 eggs will net 6 tortillas if you are using the larger skillet.
Now place 1/6 of the shredded chicken mixture in each tortilla, roll, and place them in a baking pan large enough to hold 6 enchiladas. Cover the enchiladas with the remaining enchilada sauce and shredded sharp cheddar cheese. Bake the enchiladas in a preheated 400º oven for about 10-15 minutes or until the cheese is melted and the enchiladas are heated through. Place 1 or 2 enchiladas on a plate and garnish with grated queso fresco or cotija cheese and salsa and serve.
I hope you enjoy!
Barbecue Without All the Sugar!
I love to eat barbecue. Sadly, we simply haven’t barbecued that much this summer. I don’t have a gas grille so that means getting the charcoal and the Weber out. Most of the time its just too much work just to make dinner for two. I feel like I’m wasting a good hot grille when you only cook a piece of meat for 5 – 8 minutes. While not as good, I do use our cast iron grille pan quite a bit. Well, last night we pulled out the grille and decided to have dinner outside. So as not to waste all that good barbecue heat, we cooked a bunch of stuff so that we we could have several meals throughout the week. We grilled pork steaks, ribs, turkey legs (what could be more primal than gnawing on a caveman size turkey leg) and vegetables. Man, was it good!
One other problem with barbecuing, since going primal, is the seemingly lack of choices when it comes to barbecue sauce. If they are not packed with high fructose corn syrup, they undoubtedly will have tons of sugar. I make so many things from scratch now, I decided to make my own barbecue sauce. Have you ever tried to make your own barbecue sauce. so many recipes call for sugar, brown sugar and start with a base of commercial ketchup (also packed with HFC or sugar). Of course I am not using sugar or brown sugar these days, but I do like a sticky sweet barbecue sauce. I needed to find a way to to achieve a sweeter sauce without using sugar. I think I did it. Well, kinda. I did use a little bit of honey, but the batch was big enough that I did not feel so bad about it. I was also in a hurry and was able to find a commercially made ketchup that was very very low in sugar. You of course can make your own ketchup as a base and I’m posting a recipe for that to get you started.
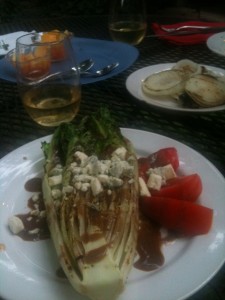
Our dinner last night was teriffic. We invited my partner’s mother over to share. She called shortly before hand to let us know she had made a macaroni salad to bring along. Oops! When we told her that was very nice but that we don’t eat pasta anymore, she showed up with fresh sliced peaches. they are in abundance now and were delicious. Catastrophe avoided. We started our dinner with a great Grilled Romaine Wedge Salad. if you haven’t tried grilling romaine lettuce, your in for a treat and its really ease. All you need to do is halve romaine hearts (if you have full heads of romaine, simply remove the outer leaves for another use). Cut the romaine hearts in half, and spray with olive oil and salt and pepper to taste. Throw them on the grille for about 2 minutes per side until they are charred. To serve, place a wedge on a salad plate with some fresh sliced tomatoe. Drizzle the wedge with a balsamic vinaigrette (1/2 cup olive oil, 3 tbls. balsamic vinegar, 1 tbls. dijon mustard and salt and pepper to taste) and then top with some crumbled blue cheese or feta. For the rest of dinner, we had BBQ’D Pork Steaks, grilled onion, and a delicious homemade cole slaw.
Now onto the barbecue sauce. If you have ketchup you like, use it, otherwise make your own.
Homemade Ketchup
Ingredients:
- 12 ounce no-salt-added tomato paste
- 2/3 cup tap water
- 4 tablespoons vinegar
- 1/2 teaspoon dry mustard
- 1/2 teaspoon cinnamon
- 1/2 teaspoon salt
- 1 pinch ground cloves
- 1 pinch ground allspice
- 1/4 teaspoon cayenne pepper
- 2 tablespoons of honey or 4 packets of purevia (stevia)
Sticky Sweet BBQ Sauce
Ingredients:
- 2 large onions, finely chopped
- 6 garlic cloves finely chopped
- 1 1/2 tbls. finely chopped ginger
- 1 1/2 cups ketchup (homemade or low sugar)
- 1/2 cup cider vinegar
- 6 tbls. soy sauce
- 1/2 cup water
- 2 tbls. honey or 2 packets of purevia (stevia)(optional)
- 1/8 tsp. cayenne pepper (if you like your sauce a little hotter)
Preparation:
Slowly Cook the onion and ginger in oil over moderate to low heat until they are a caramel color. You want the onions to caramelize to bring out all their natural sweetness. This can take 30 -40 minutes, but if you are in a hurry, you can just saute the onions and garlic and ginger until the onions are soft and translucent. At the end you can add the garlic and continue to cook for another couple of minutes. You can also add a few tablespoons of balsamic vinegar at the end, but continue to cook the onions and garlic until most of the liquid has evaporated. Add the remaining ingredients and simmer for 15-20 minutes, uncovered, stirring occasionally. Now, puree the sauce in a blender or food processor in 2-3 batches.
Your sauce is ready to use. I got 3 meals out of this batch, including all the barbecue we made last night. After refrigerated, the sauce can get a little thick, so you can just add a little more vinegar and water to thin it down before using.
Enjoy!
Eat More Whole Eggs and you’ll be Golden.
 In a facebook comment yesterday regarding my post on coconut oil, a friend indicated that he had been frying his egg whites in coconut oil for years and was glad to read about the benefits of coconut oil. My partner pointed out to him that he needed to be eating the whole egg, yolk included. He told him that “They are very good for you. Don’t be afraid of fat. Be afraid of carbs. You need all the good vitamins and minerals in those egg yolks. Eggs are a very balanced food. When you remove a part you disturb that balance. Eating the whites only actually can make you vitamin deficient and less able to absorb the protein that it sounds like you want.” I couldn’t have said it better. My partner eats about 2 1/2 dozen eggs a week. I don’t eat nearly that much but I am not afraid of eggs. I guess this friend is not different that a lot of folks out there who have fell victim to the incorrect but conventional wisdom that eggs are high in cholesterol and should only be enjoyed occasionally.
In Fact Eggs are a naturally nutrient-dense food, which means they have a high proportion of nutrients to calories. One large egg has 70 calories and provides 13 essential nutrients in varying amounts. eggs are an excellent source of choline and a good source of the highest quality protein and riboflavin. Many of the egg’s incredible nutrients are found in the egg yolk, including choline, folate, lutein, zeaxanthin and vitamin D. The yolk also includes healthy monosaturated fats and almost half of the high-quality protein found in eggs. According to the Harvard Health Publications, the only large study to look at the impact of egg consumption on heart disease—not on cholesterol levels or other intermediaries—found no connection between the two.
In a 2008 study at the University of Connecticut, a team of doctors set out to determine the effects of putting several overweight individuals (some of whom suffered from metabolic syndrome) on carbohydrate restricted diets that included 3 eggs a day. A separate group of overweight individuals were given an equivalent amount of egg substitute (0 cholesterol). Both groups after 12 weeks lost weight and decreased their waist sizes. Both groups had lower plasma triglyceride levels, but more importantly, the group who consumed 3 real eggs a day had marked increases in HDL.  These results suggest that including eggs in a carbohydrate restricted diet results in increased HDL-C while decreasing the risk factors associated with metabolic syndrome. In fact, 18 subjects were classified as having metabolic syndrome (MetS) at the beginning of the study, whereas 3 subjects had that classification at the end. Finally,both systolic and diastolic BP were significantly reduced in these subjects.
My conclusion: You’ll be golden if you eat more whole eggs. Don’t be afraid of the fat or cholesterol. It will do you good.
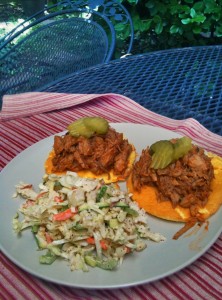
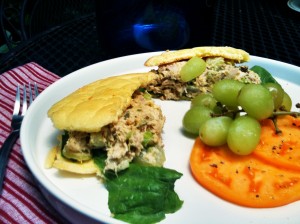
I have been trying to add more eggs into my daily diet. Recently I came across a recipe for “Oopsie” rolls. I don’t know why they are called this but they are a good bread substitute and hold up well for sandwiches. I’ve used them for chicken salad sandwiches and pulled pork sandwiches. I’ll be trying them with hamburgers soon. They are pretty easy to make and you’ll be suprised after seeing the recipe that these could actually end up like a bun. I’ve seen pictures on the internet of much fluffier rolls than mine. This could be due to the high humidity here in St. Louis. In any event when mine don’t rise very much I just use 2 of them for the sandwich.
“Oopsie” Rolls
Ingredients:
- 3 large eggs
- 3 oz. cream cheese
- pinch of salt
- 1/8 tsp. of cream of tarter
- 1 tsp. garlic powder
Preparation:
Separate the yolks from the eggs in separate bowls being careful not to ge3 any yolk in the whites. Use a clean stainless steel mixing bowl and make sure your beaters are clean and oil free. Add the cream of tarter and whip the egg whites until they are stiff (stiff peaks). In a separate bowl mix the egg yolks, cream cheese, pinch of salt and garlic powder and blend until smooth. Fold the egg yolk/cream cheese mixture into the stiff whites gently so as not to lose volume. Drop 1/2 cup of mixture onto a greased or parchment lined cookie sheet. If they are really fluffy, flatten them a bit. You should get about 6 rolls. Bake in a 300° oven for about 30 minutes or until lightly browned. Remove them from the oven and let cool for a moment and then transfer to a rack to cool completely. Eat them immediately or store them in a zip-loc bag. If they turn out fluffy you can cut them in half. Since mine sometimes turn out pretty flat I just use 2 to make a sandwich. I hope you enjoy them and eat more eggs.
Did you say that isn’t Rice? Easy Cauliflower Rice and Primal “Cornbread”
 Yesterday I posted a recipe for Home Style Primal Pepper Steak. I recommended that it be served with Cauliflower Rice, but I didn’t give a recipe for the Cauliflower Rice. I got a lot of requests, so here it is. Also, My mom used to serve her Pepper Steak with biscuits from the tube. It was great to have something to soak up the additional sauce with. I served mine with Primal Cornbread. Well, its not really corn bread. There’s no corn meal in it at all. While the texture is a little different, it is closer to cornbread than you might think. I have a set of vintage cast iron cornbread pans which I use to make mine. It looks just like cornbread and the cast iron pan makes the whole stick crunchy on the outside and moist and tender on the inside. These will work just as well on a cookie sheet or in a muffin tin, but if you have a cast iron cornbread pan, use it.!
The Cauliflower Rice is so easy to make, especially if you have a food processor. You can vary this recipe in any way you want. You can make fried rice by adding garlic and green onion to the oil, seasoning the cauliflower while its cooking with soy sauce, and when its almost done, clearing a space in the middle of your pan and walk and scrambling an egg or two in it. Drizzle it with some sesame oil at the end, and that’s it. Try Cauliflower rice Pilaf by adding green onion, garlic and diced mushrooms to the oil before adding the cauliflower.
Simple Cauliflower Rice
All you need is a non-stick skillet or a wok, a food processor with a grater attachment or box grater. This will make 3-4 large servings/sides.
Ingredients:
- 1 head cauliflower
- 2-3 tbls. olive oil or coconut oil
- salt and pepper to taste
Preparation:
Begin by cutting up the cauliflower so it will fit through the feeding tube of your processor with the grater blade attached. Grate all of the cauliflower. If you are not using a food processor it is just as easy although a little more time consuming to grate the cauliflower on a box grater by hand. Use the largest grater section you have. Heat your non-stick skillet or wok over medium high heat and add 2-3 tbls. olive oil or cocomut oil. When the oil is hot, add the cauliflower and season with salt and pepper. Stir fry the cauliflower for 5-8 minutes until the cauliflower is cooked and heated through. Stir the the cauliflower ofter. It will shrink significantly while cooking. Be careful not to overcook as the cauliflower may get mushy, Remove from the heat and serve immediately as a side to just about any dish. It goes great with a simple stir-fry or even better with my Home Style Primal Pepper Steak.
Primal Cornbread
You will need a muffin tin, muffin top pan, or cast iron cornbread pan. This will make 6-8 biscuits or cornbread sticks.
Ingredients:
- 4 eggs
- 1/4 cup cooled, melted butter
- 1/4 tsp. salt.
- 1/3 cup coconut flower
- 1/4 tsp. baking powder
- 4 oz. shredded sharp cheddar cheese
- 1 tbls. honey (optional)
Preparation:
Preheat oven to 400º. Whisk together the eggs, cooled melted butter, salt, and honey (optional) and set a side. Next combine sifted coconut flower with baking powder and mix together well. Add the coconut flour mixture to the wet ingredients and stir to combine well. Fold in the cheddar cheese. Spoon the mixture into a greased muffin tin, muffin top pan, or cast iron cornbread pan. Bake for about 15 minutes until well browned, but not burned. Keep you eye on them! Serve them hot alongside your favorite dish, soup or chili. These heat up really well later in a toaster oven. They will freeze well and crisp up nicely in a toaster oven straight from the freezer.
Enjoy and let me know what you think.
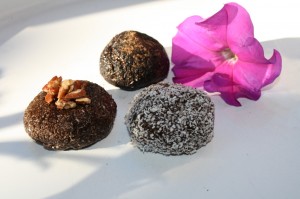
Primal Choco-Coco Truffles
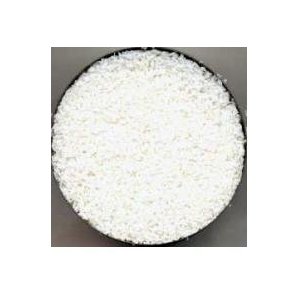
On my first outing to find coconut flour I went to my favorite international food store. I had never seen coconut flour before so I didn’t really know what I was looking for. I searched and searched, and nothing. I finally asked the helpful, but not very good English speaking, clerk for help and she pointed me to a bag of coconut powder. It didn’t look much like flour to me, but, since I didn’t know any better, I bought it. The ingredient list showed simply “coconut”. It looked more like coconut granules, but not like shredded coconut. I got it home but still wasn’t sure I really got what I was looking for. I put it in the cupboard and scoured the internet for recipes using coconut flour. A few days later, while at my local grocery store, I was looking at the Bob’s Red Mill display, and quickly determined that what I had just bought was clearly not coconut flour. It was too granular and white. Oh well, the deed was done. Now I had to find something to do with this big bag of coconut powder I had just bought. If you read my recent post, Cuckoo for Coconut, I made a delicious chicken dish coated in the coconut powder and topped with mango salsa. The combination of coconut powder and almond meal made a coating for the chicken that was hardly discernible from the bread crumb version I’m sure most of you have had. I think the coconut powder works better than shredded coconut as it coats the chicken better and more closely simulates the “bread” crumb look.
I’ve since come up with another perfect use for coconut powder. Primal Choco-Coco Truffles. Now before you run out to find coconut powder, be warned, there is another product out there called coconut cream powder. This is more like coconut powdered milk. Don’t use this for the truffles, it will not work. Also, this recipe does use stevia, not very much, but I’m sure some of you may not like this. I have to tell you though this was such a treat. I really felt like I was eating a gourmet truffle from the candy shoppe. Here’s the recipe:
Choco-Coco Truffles
This recipe will yield 4-6 truffles, depending on how big you make them. You will need:
- 2 tbls. Crunchy Almond Butter
- 2-3 tbls. coconut powder
- 1 scant tbls. cocoa powder
- 2 packets of stevia
- pinch of salt (if you are using salt free almond butter)
- additional cocoa powder for dusting or finely chopped pecans for rolling
Combine the almond butter, cocoa, stevia and pinch of salt in a mixing bowl. When all of these ingredients are well combined, add 2 tbls. coconut powder. The consistency should allow you to roll the mixture in your hand into a ball. If it is too runny, add more coconut powder until you can easily form the mixture into balls. Using a tablespoon size measuring spoon, scoop one tablespoon of the mixture into your hand and roll it into a ball. Continue with this process until you have used all the mixture. Now you can roll the the balls in your favorite finely chopped nuts, or cocoa powder. You can leave also leave them as is. Place the truffles in the refrigerator for about 1/2 hour to allow them to set. Remove them from the refrigerator (one at a time if you can) and enjoy!
Buy Locally, Eat primally!
 I try to shop locally as best as I can. Sometimes that can be challenging, especially during the winter months when the farmers’ markets aren’t in full swing. Recently I discovered that I could buy locally produced bison meat at the Soulard Farmers Market. The Soulard Farmers Market is a St. Louis gem. It is the oldest farmers’ market west of the Mississippi. You can get anything from rugs, to jewelry, to locally made goat cheese here. While the market is chock full of vendors selling commercially grown produce, there are also plenty of local vendors from whom can buy organic locally grown produce. The market is only open Wednesday through Saturday.
A couple of Saturdays ago we popped into Frandeka’s Meat & Fish. I’d never been in this butcher shop but was pleasantly surprised. It has apparently been in business for nearly 100 years. The employees are super helpful and the lines move pretty quickly.  They sell everything from beef, to pork, goat and rabbit. A sign advertising bison bratwurst immediately caught my eye and I inquired about it. It turns out that their bison bratwurst come from Sayersbrook Bison Ranch which is located just about an hour from St. Louis. I love sausage, and I loved even more that it was being produced in my back yard, so I decided to give it a try. It was about $10 a pound, but, I felt it was worth it because it was locally produced. When the employee handed me the package he also told me that he had 1 lb. packages of bison tenderloin tips on sale for $7.99. (Four 4 oz. bison fillets are selling for $55.95 on the Sayersbrook Ranch site). Sold! I got a package of that too.
When I got home I wanted to find out more about this local producer and how the bison are razed. In addition to trying to buy from local producers, I also try to buy grass fed meat, Its just healthier and better for you, is higher in protein, and contains the good omega 3 fatty acids we need in our diet. According to the Sayersbrook Bison Ranch website, their bison are grazed on Missouri’s native grasses, but in their last three months, they are fed “a special blend of all natural grains that enhances the flavor and tenderness of these award winning meats”. Bummer! While I like the fact that the bison are initially grass fed, I didn’t really like the idea that they were finished on grain. However, I think that this is much better than the typical corn/grain fed meat you get at your local grocery.
The terms “grass fed” and “pastured” aren’t really regulated, so I’ve heard that some producers are not completely honest about their methods. I was glad to see that Sayersbrook was up front about their processes. It’s important to get to know your producers, and that is a lot easier to do when you buy locally. Unfortunately, even short term finishing on grains or corn can greatly diminish the good omega 3 content of meat. While I’m not convinced that this is a good method, I have to think that it is somewhat better than the alternative. Of course, I would always recommend and prefer to buy purely grass fed beef. The health benefits are clear. For a lot of us, this is hard to do, so, if you try to do it is much as you can, you will surely be better off.
In any event, the deed was done. Now I had to do something with the tenderloin tips. Bison is typically lower in fat, and cooking it can be a challenge for some. If you cook it too long, it will be tough and dry. As I was trying to decide what to do with the tenderloin tips, I started thinking about my favorite dish in Vietnamese restaurants, Thit Bo Luc Lac or known to some as Shaken Beef. It’s typically one of the more expensive dishes on many Vietnamese menus. It usually features quick sauteed beef, fresh tomato, onion and some kind of green. It is served with a salt and pepper dipping sauce that will knock your socks off. So I went about creating this dish and it turned out fantastic. It was really quick, healthy and perfectly primal. Along with the sliced raw onion that is typically served with it, I made some pickled red onion as well. You don”t need bison Tenderloin, but can substitute any grass fed beef or even pork. I would recommend a tender cut like tenderloin or sirloin. With 1 pound of bison, this was enough for 2 hearty appetites, but could make a light meal for 4. Here it is:
Thit Bo Luc Lac (Shaken Beef/Bison)
The Dipping Sauce:
-
1 tsp. black pepper
-
1/2 tsp unrefined fine sea salt
-
juice of one medium lime
Marinade for the Meat:
-
Juice of 1 medium lime
-
2 tbls. soy sauce
-
1 tbls. sesame oil
-
1 tbls. Vietnamese fish sauce
-
2 cloves garlic, peeled and chopped finely
-
1 tsp. black pepper
For the Pickled Red Onion:
-
1 large red onion
-
3/4 cup seasoned Japanese rice wine vinegar
-
2 tbls. chopped fresh cilantro
For the Salad:
-
1 lb. Bison Tenderloin, Beef Tenderloin or Pork Tenderloin cut into 1″ cubes
-
2 ripe tomatoes
-
1/2 thinly sliced white onion
-
6 Cups baby spinach or watercress
-
1-2 tbls olive or coconut oil for cooking the meat.
Preparation:
First prepare the marinade by whisking together all of the marinade ingredients in a bowl. Cut the bison, beef or pork tenderloin into one inch cubes and place in a zip lock bag. Pour the marinade over the meat and seal the bag. Shake the bag around to ensure that you have coated all the meat in the marinade. Marinate the meat in the refrigerator of 1/2 hour to 1 hour.Â
Meanwhile prepare the pickled red onions. Bring 3/4 cups of japanese seasoned rice wine vinegar to a boil in a sauce pan. While this is coming to a boil, finely slice the large red onion. When the vinegar comes to a boil, place the onions in the boiling vinegar. Press the onions down until they are submerged in the hot liquid. The onions will begin to whlt and they will all fit in this amount fo liquid. Remove the pot from the stove and pour the contents into a heat resistent bowl. Add 2 tbls. of chopped cilantro and stir to combine. Cover and refrigerate the pickled onions until you are ready to serve.
Next, prepare the dipping sauce. Combine the juice of 1 medium lime with 1 tsp. pepper and 1/2 tsp. of fine unrefined sea salt and set aside.
After the meat has marinated long enough, remove it from the refrigerato and drain the marinade and discard. Meanwhile prepare the salad. Place 3 cups of baby spinach or watercress on 2 plates. slice the tomatos and arrange around the plate. Slice the 1/2 white or yellow onion and set aside. Equally divide the pickled red onions among the 2 plates. I like to do this with tongs or a slotted spoon so that you don’t end up with too much vinegar. You can always spoon additional vinegar from the pickled onions over the salad if you like.
Meanwhile heat 1-2 tbls. of olvie oil or coconut oil over medium high heat in a skillet. When the oil is hot, place the meat in the hot oil, but don’t overcrowd it. You can cook the meat in 2 batches if necessary. Be sure to not disturb the beef in the pan so that you can brown the meat well. After about 2 minutes, shake the pan to cook the other sides of the meat cubes. The meat should be medium rare to medium in about 2 more minutes. If you like your meat cooked more well, leave it in the pan for a couple of more minutes, shaking the meat occasionally.
When the meat is done to your liking, mound the browned meat cubes in the center of the plate and garnish with the sliced raw white onion. Serve with the dipping sauce on the side. You can dip the meat cubes in the sauce as you are eating the salad, but beware, the sauce is peppery and tangy.
Enjoy.
